Thank you for using UBC Studios’ new QReserve booking system! This page is a guide on how to use the software, whether at home, on campus, or in the UBC Studios equipment hub.
You will require:
- Your student or employee card
- Your CWL
- An internet connection
- A valid reason for renting the gear that aligns with the UBC Studios equipment rental policy. Still not sure if what you’re doing is okay for our rental policy? Contact us here!
- Step one: Choose your gear from our equipment catalogue and click “Check Out.” If you’d like to ask UBC Studios staff direct questions about the gear, click on “Contact.”
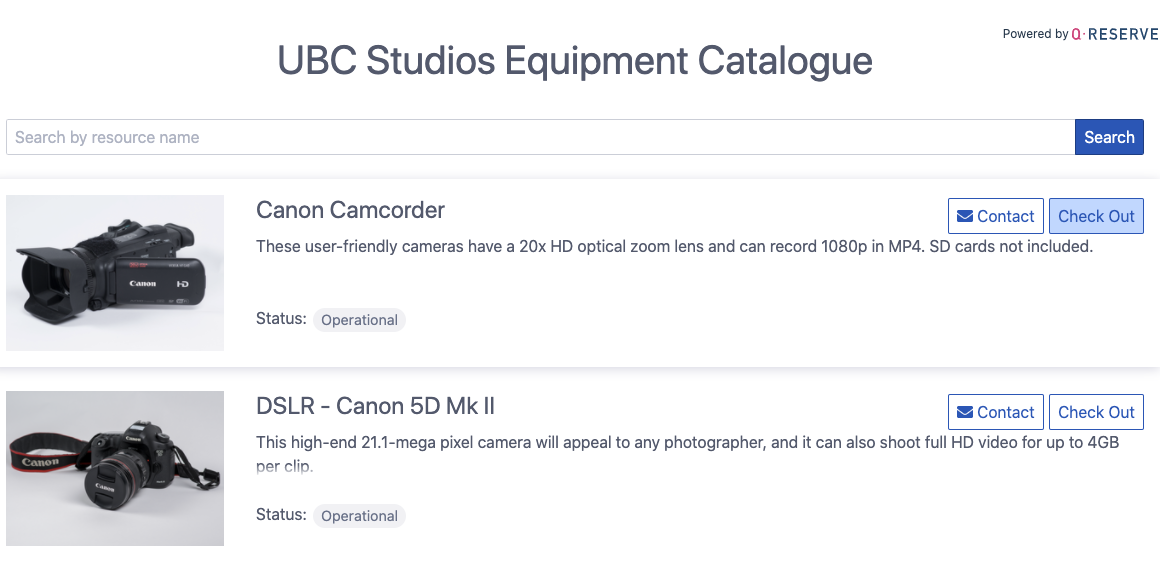
In the UBC Studios equipment catalogue, you can either search for an item, contact UBC Studios staff for more information, or click check out to begin the rental process.
- Step two: After opening the QReserve portal, click on Sign in With Partner.
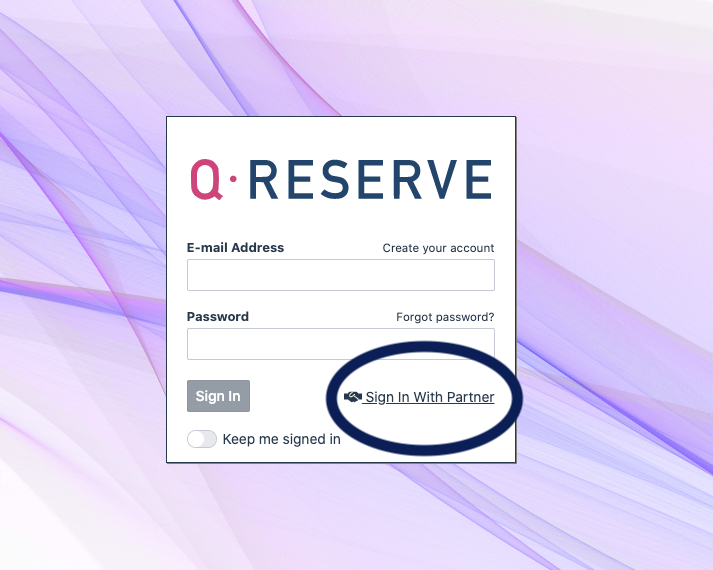
Click on “Sign in with partner.”
- Step three: From the drop down menu, choose “University of British Columbia.”
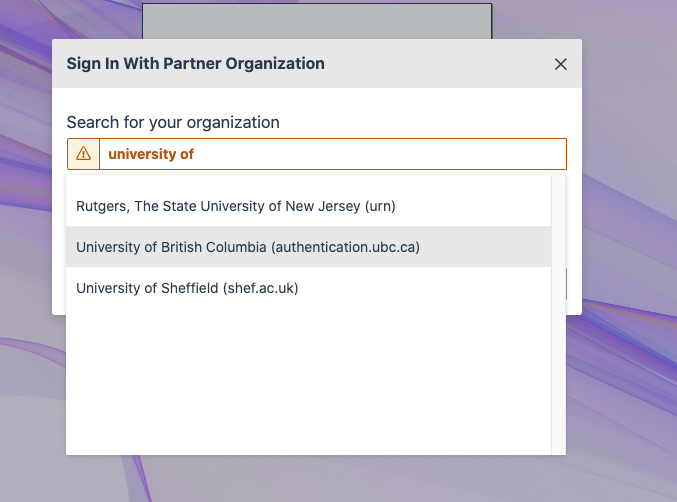
Choose the University of British Columbia.
- Step four: Log in using your CWL and password.
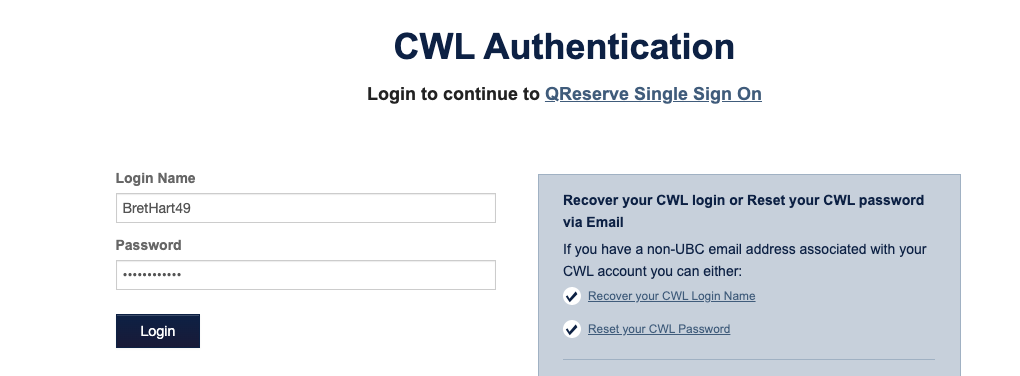
Enter your CWL and password credentials and log in to QReserve.
- Step five: Click on either “Check Out Now” for a drop-in reservation or “Create Future Reservation” for a later booking. Please note that the Check Out Now option is disabled while UBC Studios is closed. It is only available during our open hours between 10 AM and 4 PM.

- Step six: Click on a date from our booking calendar, using either the month, week, or day view.
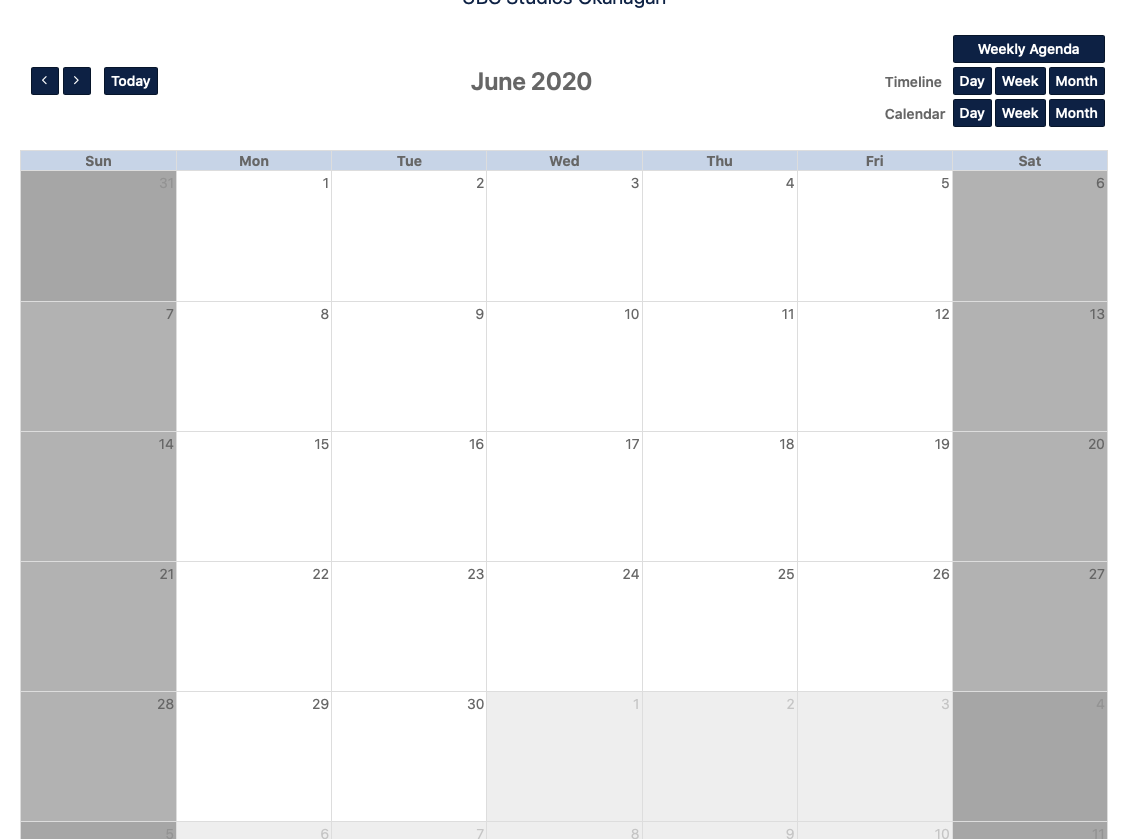
Choose a date that you would like to pick up the gear.
- Step seven: Begin filling out our form by inputting your information.

- Step eight: Choose your requested kit number. This is based solely on preference, there is no difference between the gear chosen. If you have no preference, leave blank and move to step nine. Due to equipment availability, UBC Studios may not be able to accommodate your preferred equipment request.

- Step nine: Agree to our equipment policy form.

- Step ten: Input your final information in to the QReserve form. Once finished, click “Reserve.”

An email will be sent to UBC Studios staff requesting confirmation of your booking. Once approved, stop by the UBC Studios Commons Service Hub in COM 204 to pick your gear. Still having issues? Contact us at ubcstudios.ok@ubc.ca.
